Are you aiming to boost your brand’s online presence in 2024? If yes, then establishing a strong social media presence should be your top priority.
Facebook, a social media platform with 2.9 billion monthly active users, can be a good place to start. With access to such a huge potential audience, it’s not a surprise that 89% of social media marketers already use Facebook to promote their business.
However, with Facebook constantly updating its features and policies, it can be tricky to know how to set up your page correctly.
This article will walk you through the step-by-step process of creating a new Facebook page as well as deleting an existing page if needed. We will also give you some tips to manage your Facebook Page.
Why Is a Facebook Page Important?
Before we dive into the nitty-gritty of creating and deleting Facebook Pages, let’s briefly touch on why having a Facebook Page is crucial for your brand:
- Better Reach – About 67% of monthly active users are active daily on Facebook. To put that in perspective, that comes to around 1.98 billion daily active users. This means that Facebook is a lucrative platform to help you reach potential customers across the globe and grow your brand’s reach online reach.
- Increased Brand Visibility – According to Hootsuite’s Social Media Trends 2023 report, 54.9% of Facebook users research brands and products on the platform. That’s why a well-maintained Facebook Page can significantly increase your brand’s visibility.
- Advertising Opportunities – Facebook offers powerful advertising tools, allowing you to create highly targeted ad campaigns. A report by WordStream puts forward that Facebook ads receive an average click-through rate (CTR) of 0.9%.
So, whether you wish to browse and use Facebook for personal use or grow the reach and online visibility of your well-established brand or a local business, a Facebook page can help you in a multitude of ways.
Let’s look at the steps to create and delete a Facebook page.
How to Create a Facebook Page?
Creating a Facebook Page is a great way to establish an online presence for your business, organization, or personal brand. It allows you to connect with your audience, share updates, and promote events or products.
Here’s a step-by-step guide to help you set up your own Facebook Page:
Step 1: Log in to Your Personal Facebook Account
You should note that Facebook Pages are different from personal Facebook Profiles. To create a Facebook Page for your brand, you must have a personal Facebook profile. You can easily sign up on the Facebook website if you don’t have one.
If you don’t want to use your personal account, you can sign up with your business email ID to create a Facebook Page and separate your personal and work lives.

Step 2: Facebook Page Creation
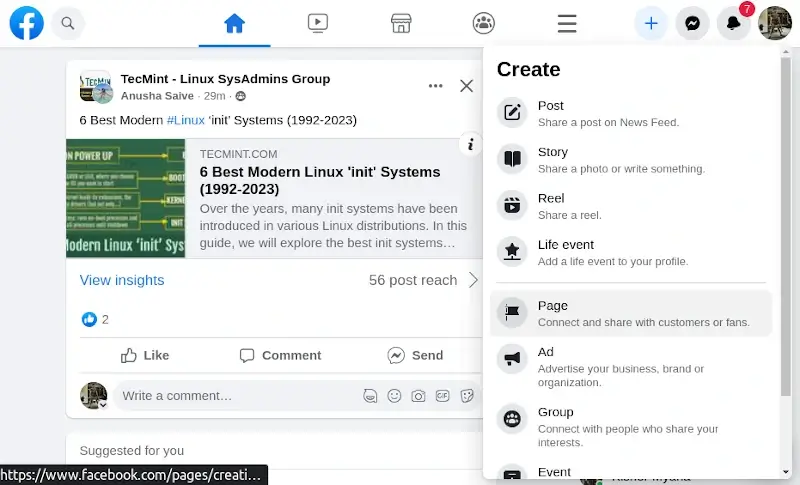
Once logged in, click on the drop-down menu in the top-right corner of your Facebook homepage. It is usually represented as nine dots in the shape of a square or + (plus) sign and select “Page” from the menu.
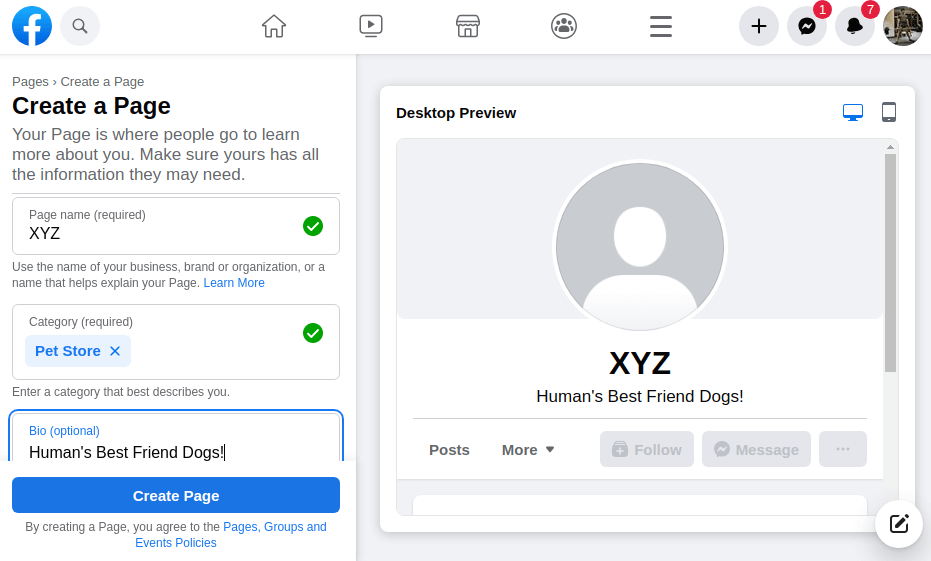
Step 3: Fill Facebook Page Business Information
Now, you have to fill in the required information for your Page. Add your Page name, category, and description.
Facebook offers several page categories to choose from, such as “Local Business”, “Company”, “Pet Shops”, and many more. Select the category that aligns with your brand.
After filling in all the required information, click ‘Create Page‘.
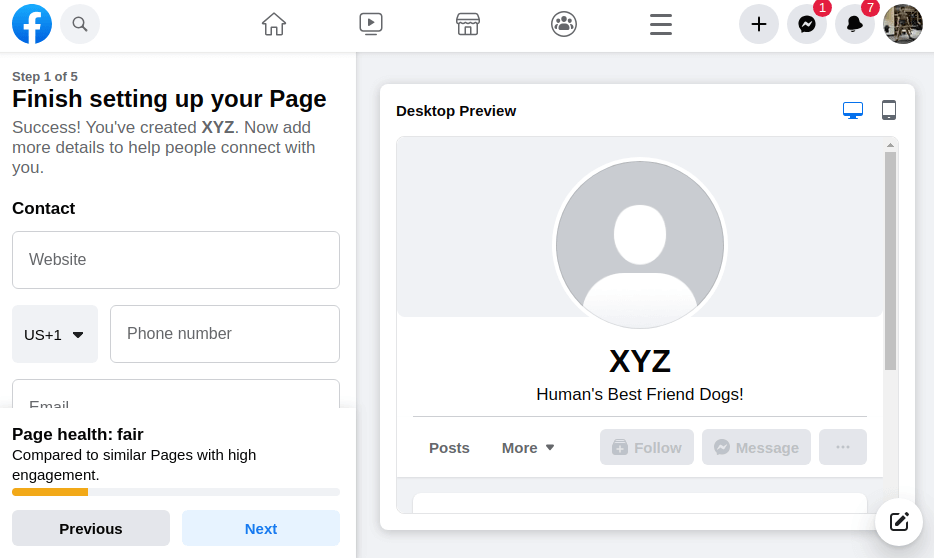
Congrats! Your Facebook Page is ready! But wait. There is more information that needs to be added. You still have to ensure that the Page looks professional.
Step 4: Add Your Facebook Business Details
In this step, you will have to add more information about your business, such as website link, phone number, location, business hours, and more. However, all these fields are optional; you can choose not to add information like your phone number.
Step 5: Add Facebook Profile and Cover Photos
It’s not compulsory to add a profile and cover photo. However, these images are essential for making your brand memorable and recognizable on the platform.
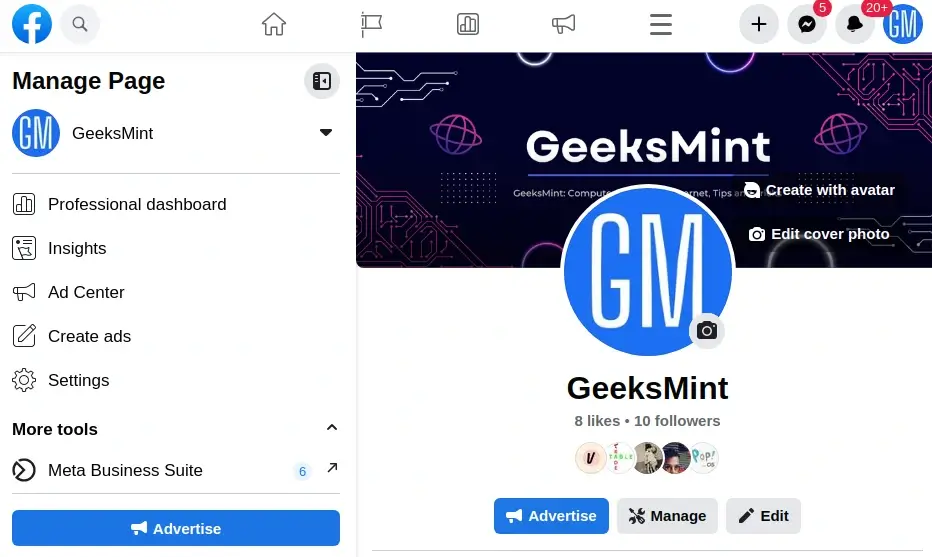
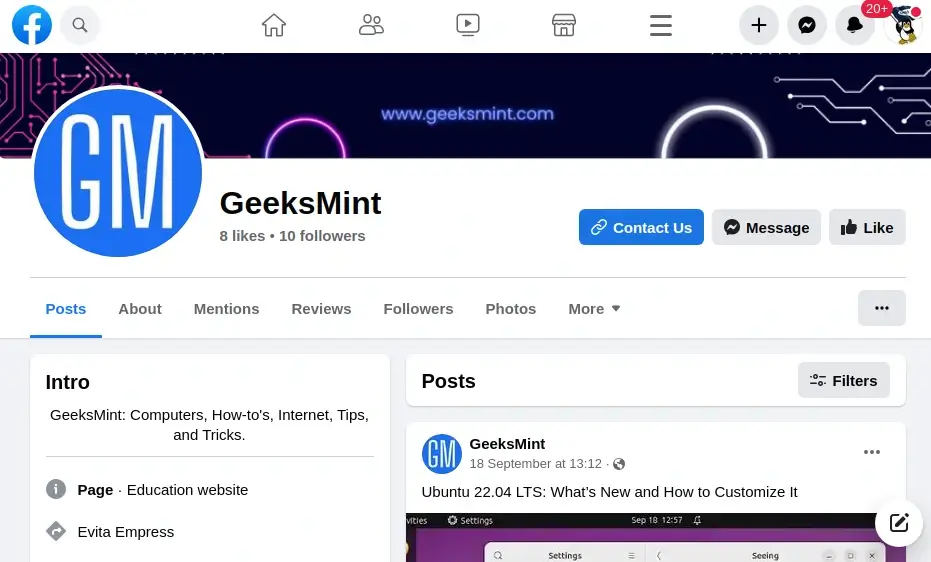
For example, take a look at GeeksMint’s Facebook page:
Pro Tip: Analyze your competition for inspiration. Profile pic should include your logo. Get creative, and use a color scheme that’s eye-catching, consistent with your branding, and helps you stand apart from the crowd.
To add a Page or cover photo, you can simply click on camera icons.
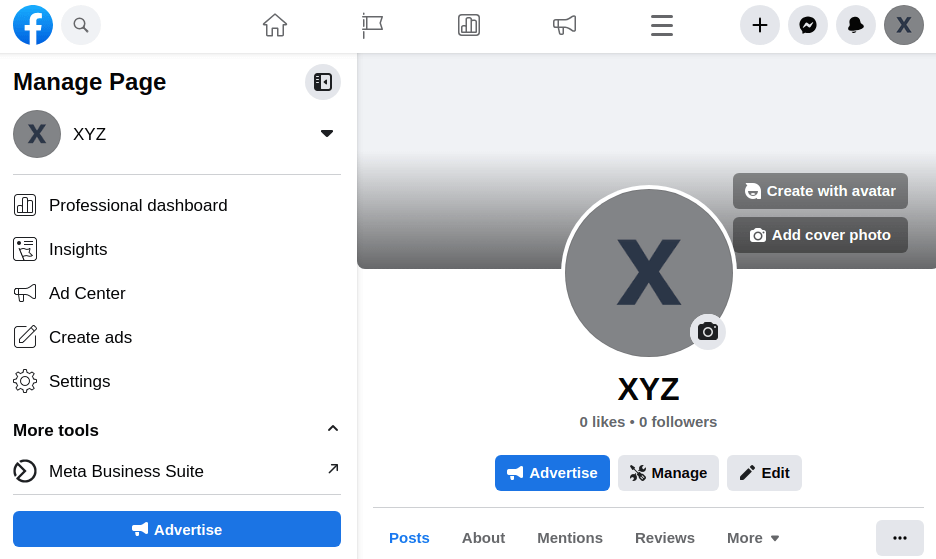
Facebook then gives you options such as “Upload a Photo”, “Select a Photo”, or “Create an Avatar”. You can choose as per your brand guidelines and add photos accordingly.
Step 6: Add a Call-to-Action Button
What is the ultimate goal of your Facebook Page? Do you want your audience to visit your site? Do you want them to shop? With a call-to-action button, you can encourage your audience to take specific actions.
Take a look at GeeksMint’s Facebook Page. It consists of a “Contact Us” call-to-action button.
To add a call-to-action button, open your Facebook page and scroll down. Here, you will see a button labeled “Add an action button” and click on it.
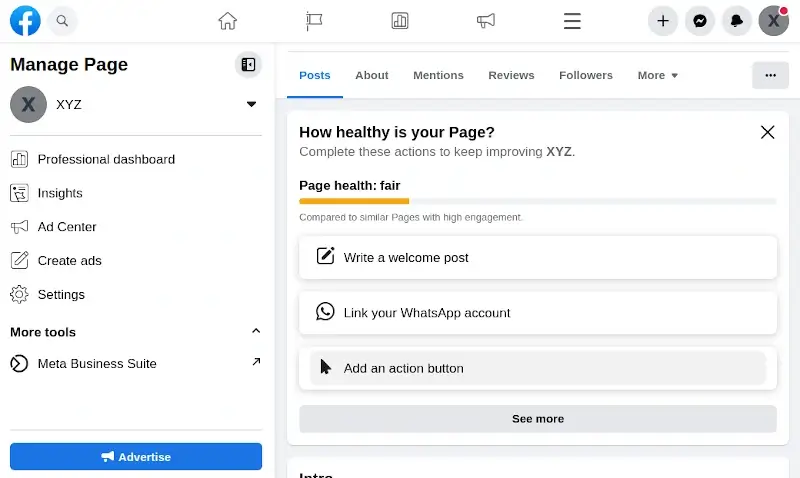
A pop will appear on your screen.
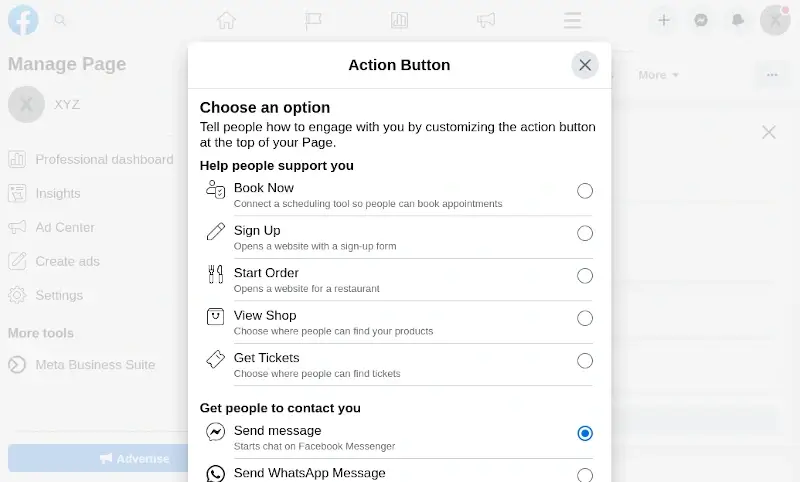
From the given options, select an action button as per your goal and press “Next”. Now, your Facebook page is ready to drive growth for your business.
5 Simple Tips for Managing Your Facebook Page
Now that your Page is up and running, it’s essential to manage it effectively. Here are some tips to manage your Facebook page with no hassle:
- Post Regularly – Maintain an active presence by posting relevant content regularly. On average, Facebook Page posts 1.68 times per day. Use a content calendar to plan and schedule posts in advance.
- Experiment – They say, “Experience is the best teacher.” No one can tell what kind of content will work for you. The only way to figure it out is through trial and error, testing different types of content, and analyzing the top posts and user engagement. Just keep in mind that your content should be valuable and shareable.
- Engage – Respond to comments and messages promptly. This simple act builds trust and loyalty among your audience. Consumers are 53% more likely to purchase from a business open to communication.
- Take Data-Drive Decisions – Monitor your Page insights to gain valuable data about your audience’s behavior. Based on these insights, adjust your Facebook growth strategy.
- Run Facebook Ads – Studies have concluded that Facebook ads are visible to 33.3% of the global population. Boost your Page’s visibility by running targeted Facebook ad campaigns. Use the Ads Manager tool for precise control over your ads.
How to Delete Your Facebook Page?
You can either temporarily deactivate your Facebook page or delete it permanently. You can choose to deactivate your page temporarily if you decide to take a break from social media or for other reasons like privacy concerns.
There may come a time when you need to delete your Facebook Page. Perhaps your business is looking to rebrand or make a fresh start, or you no longer require that page and wish to delete it instead of having a dead page with your brand’s name.
However, it is advisable not to delete the Facebook Page unless you are going out of business.
Here’s how to deactivate or delete your Facebook Page:
Step 1: Open Facebook Manage Page Settings
Open your Facebook Page and go to the “Manage Page” menu present on the left and open Settings.
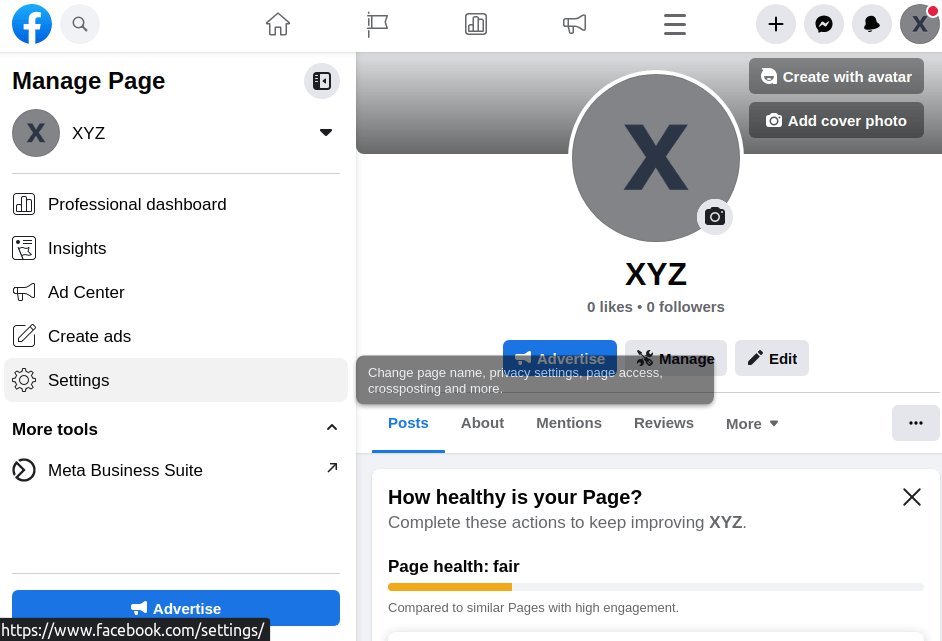
Now open the “Privacy” tab that will provide you with several options. To delete the page, you need to click on “Facebook Page information”.
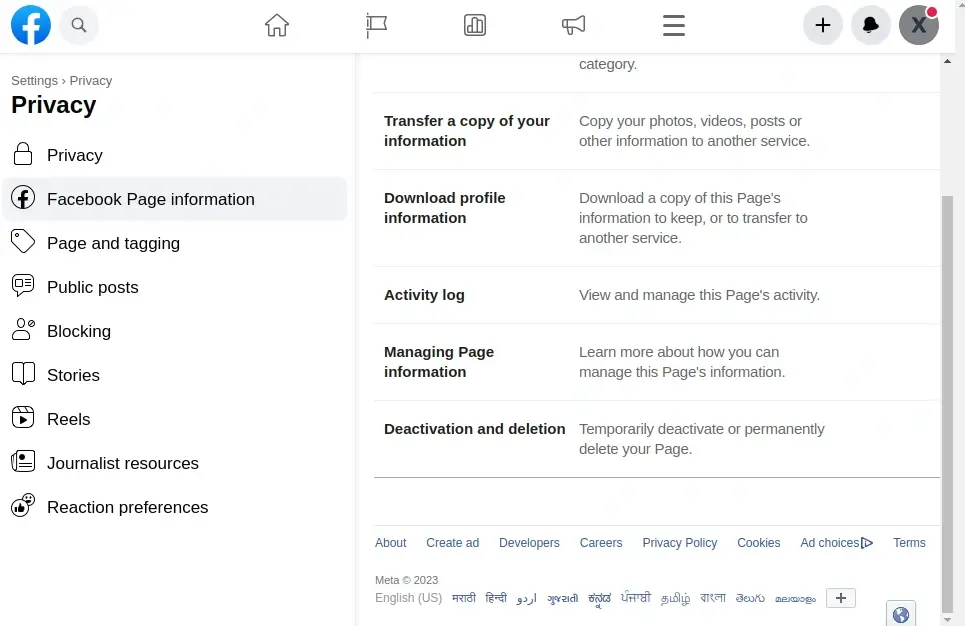
Step 2: Delete Facebook Page
Here, you will have more information about your page, just scroll down to the “Deactivation and deletion” part and click on “View“.
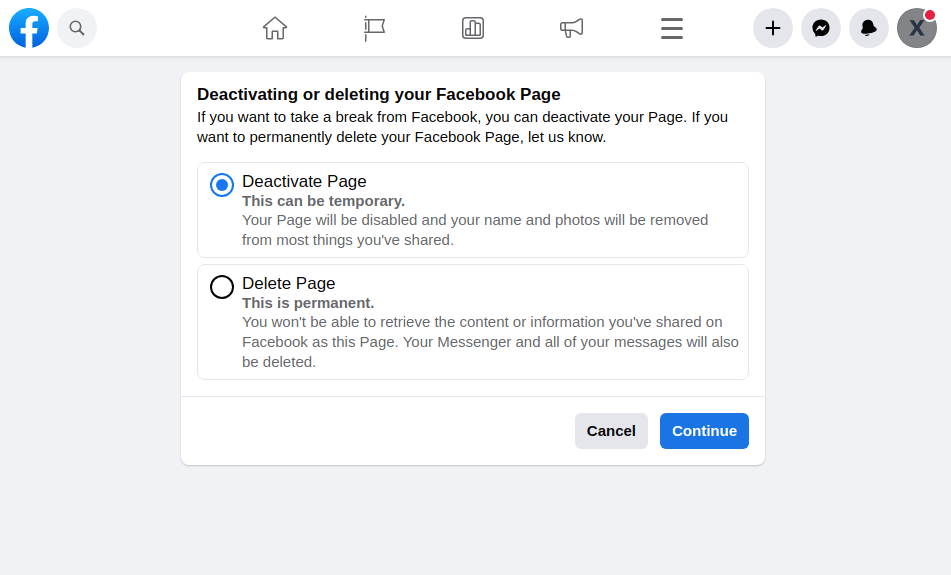
Follow the on-screen prompts to either deactivate or delete your page. Once decided, hit “Continue”.
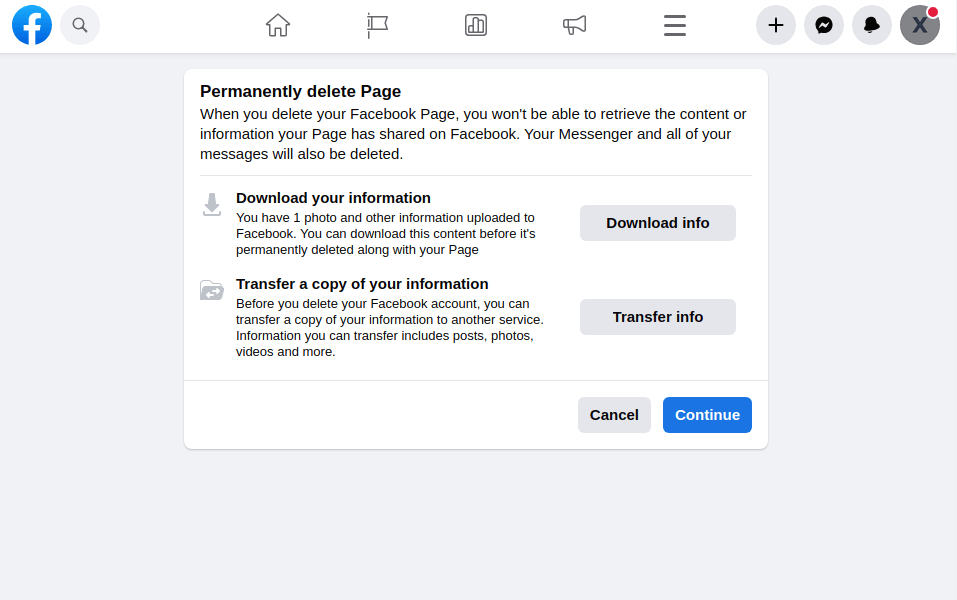
Before deletion, Facebook will give options to download or transfer your data. It is better to store your data; otherwise, if you change your mind later, you might regret it as there’s no way to get it back!
Select the option that suits you best, and again hit “Continue”.
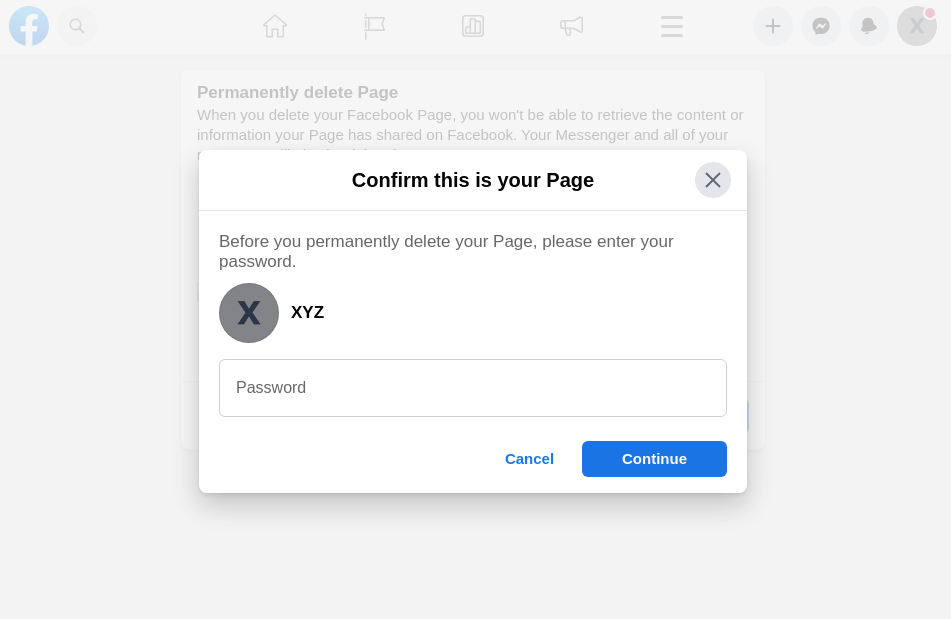
Now, Facebook will ask for your Page password to ensure that the right person is taking action. Enter your password and again click “Continue”.
Clicking “Continue” will be followed by a warning and confirmation pop-up. This time, clicking “Continue” here will delete your Page!
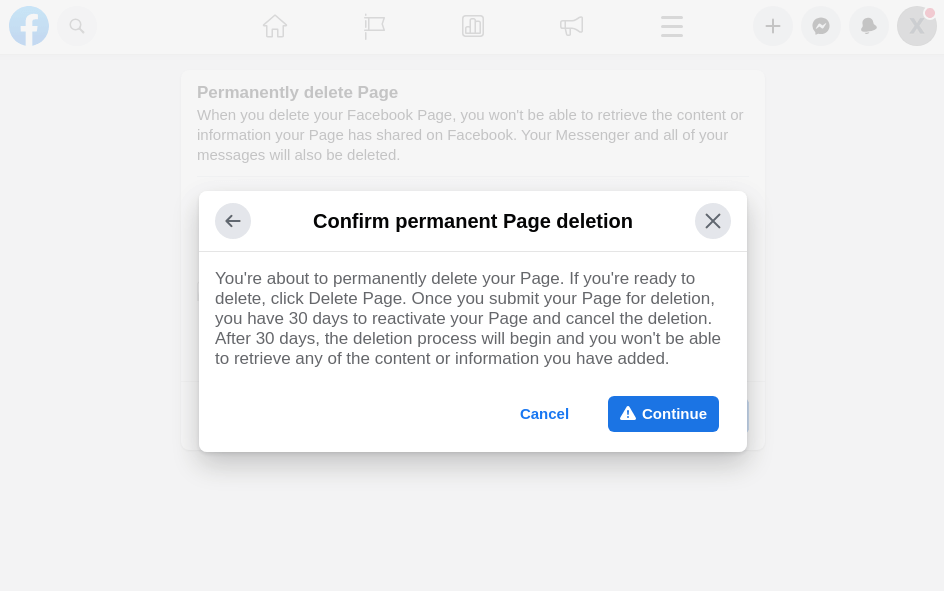
If you choose to delete your Page, Facebook will still allow you to restore it within 30 days of deletion. After this period, your page will be permanently removed.
Conclusion
Creating a Facebook Page is fundamental for any brand looking to thrive in the digital landscape. Follow the steps in this guide to create a Facebook Page that is a cornerstone of your social media marketing strategy. And when the time comes, you’ll also know how to delete it if necessary.
We hope this easy guide answers all your questions and helps you through the process of easily creating or deleting a Facebook page with ease.