In today’s digital era, our email inboxes can get really crowded with lots of messages. This makes it important to clean up and organize our email hub.
Luckily, Gmail, a popular Google email platform that provides users with free email accounts, ample storage, and handy features to customize their experience.
Among its features are advanced search capabilities that allow users to easily find specific emails. In addition, Gmail has security features that keep users accounts safe,
It employs a variety of security measures, including two-factor authentication, spam filtering, and phishing detection.
Receiving notifications on your device about your email storage space running out can be terrifying, especially if you expect an email to land in your inbox.
The good news is that Gmail includes different ways to easily delete all your emails that allows you to erase everything at once rather than cleaning up the emails one at a time.
Before we start into the how-to, let’s address the “why Delete Emails“. Well individuals often seek to clear their Gmail inboxes for various reasons such as privacy, need more organized workspace, or simply declutter and enhance email efficiency.
In this guide, We will help you become an expert at deleting emails in different ways. To stay informed, check out this detailed guide on how to delete all emails in Gmail.
Delete Emails in Bulk on Web
Deleting emails in bulk on the web is a straightforward process. Here’s a step-by-step guide:
- Open any web browser and log in to your Gmail account using your username and password.
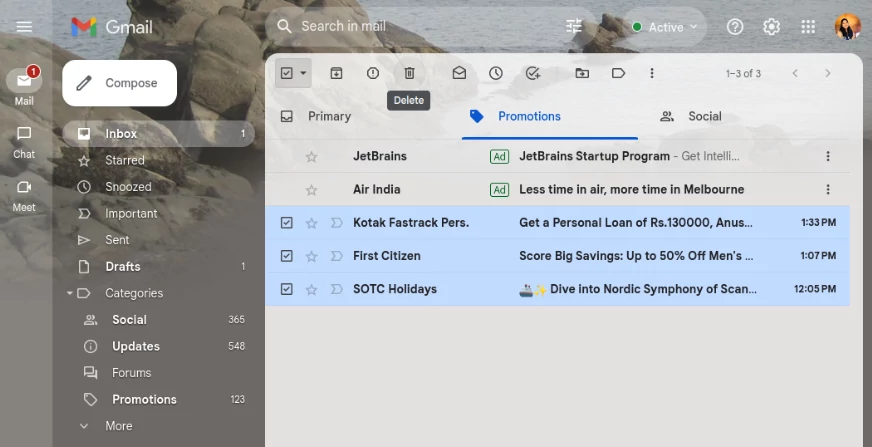
- Once you login, navigate to the “Select All” option situated to the left of the refresh button. Clicking on “Select All” will choose all the emails on the first page.
- After selecting the emails, find and click the “Delete” button. This action will remove all the chosen emails in one go.
That’s it! Your Gmail inbox is empty.
How to Mass Delete a Specific Type of Email in Gmail
If you don’t want to move your entire inbox to the bin folder, there are always ways to clean out specific emails from different angles.
Perhaps you know that all emails from a specific sender are trash-worthy, or that emails from past years are safe to delete. This is how to bulk delete a specific type of email.
1. Using Gmail Categories
Follow these steps to delete emails using Gmail categories.
- Sign in with your Gmail account.
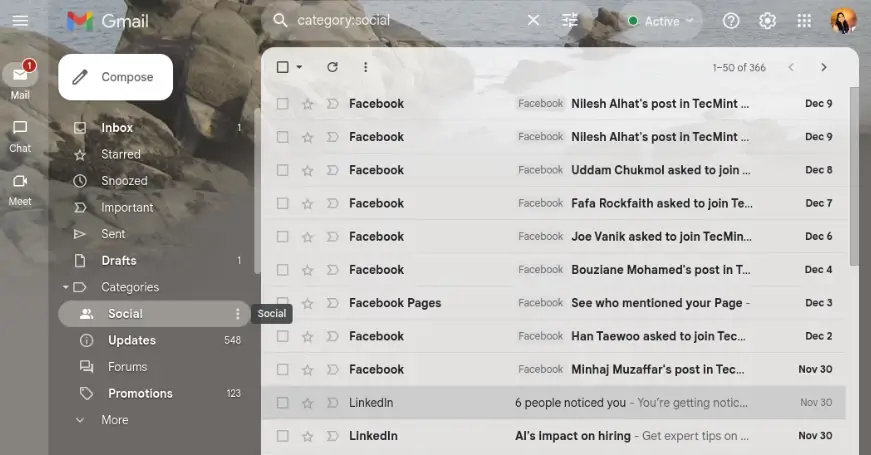
- On the left side of the Gmail interface, find and click on the “Categories” tab. This will show different email categories like Primary, Social, Promotions, Updates, Forums etc.
- Choose the Specify category from which you want to delete emails. Click on the category name.
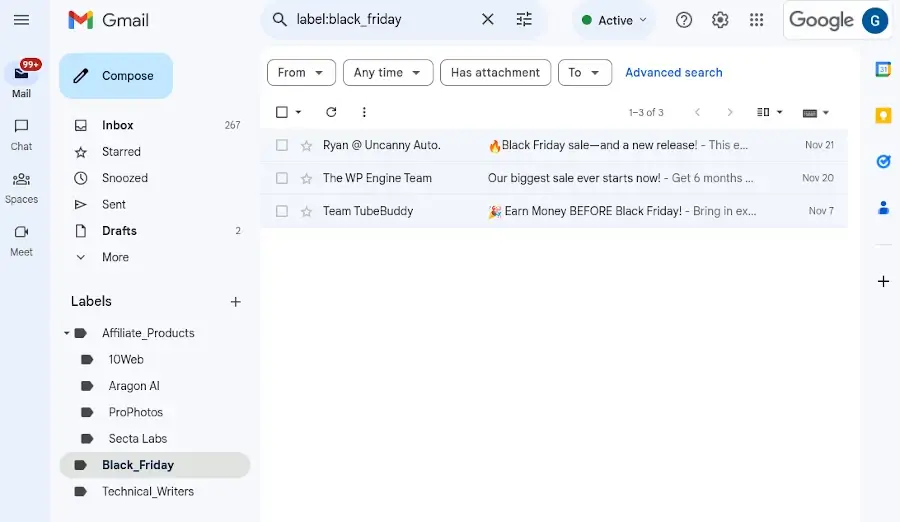
2. Using Labels
Screen down on the left sidebar of your Gmail account and select the option Labels. Choose the label you want to remove. The procedure is probably familiar to you by now, “select the select all” box located at the top left side of your screen and click the delete button.
3. Using Date Range
In the Gmail search bar, to remove emails before a specific date range use “before: YYYY/MM/DD“. and to remove emails after a given date, use “after:YYYY/MM/DD“.
To eliminate emails within a specific time frame, input the time frame in the search bar using the following subsequent format “after:YYYY/MM/DD before:YYYY/MM/DD“.
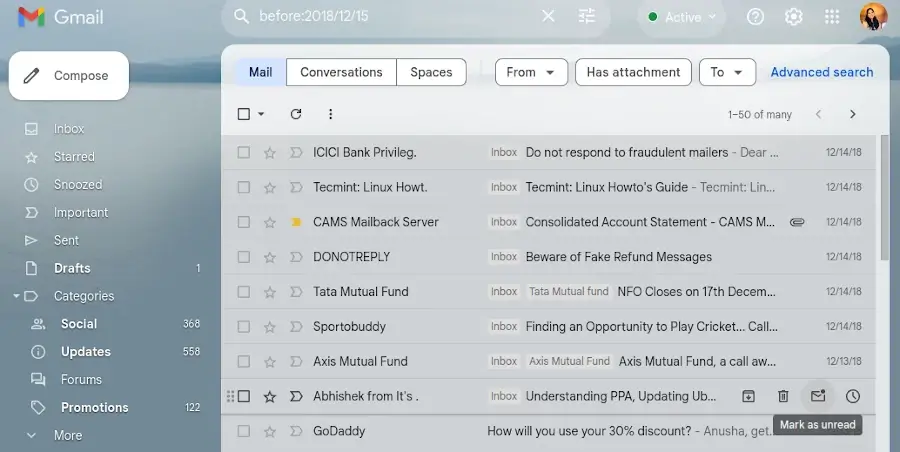
Click Enter, and Gmail will display emails within the specified date range. Now select the emails you want to delete, and then finish by clicking the delete or archive button.
To permanently delete the emails, go to the Trash folder and click “Empty Trash now“.
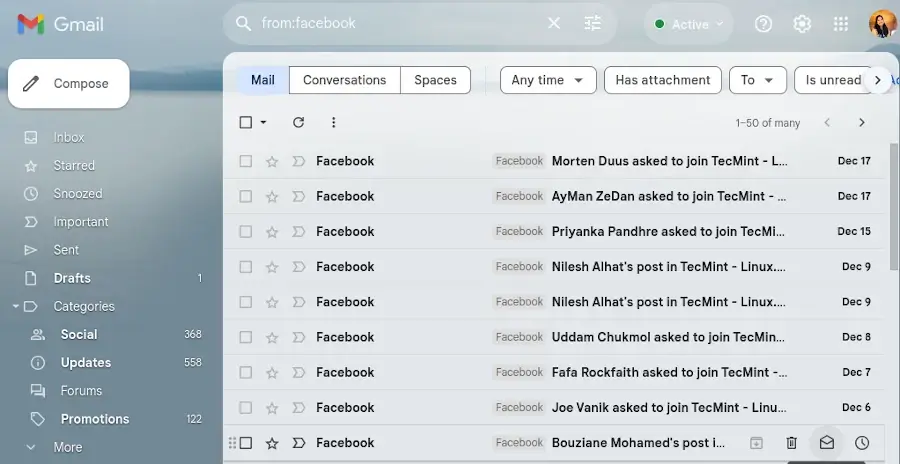
4. Using Sender
If you want to remove emails in bulk from a specific sender, In the search bar, type “from:sender_name” and press enter.
This will display all emails from the specified sender. Click the checkbox in the top left corner to select all emails on the current page and click the “Delete” button.
5. Using Read and Unread Emails
In the search bar, type “is:unread” to delete all unread emails and “is:read” to delete all read emails.
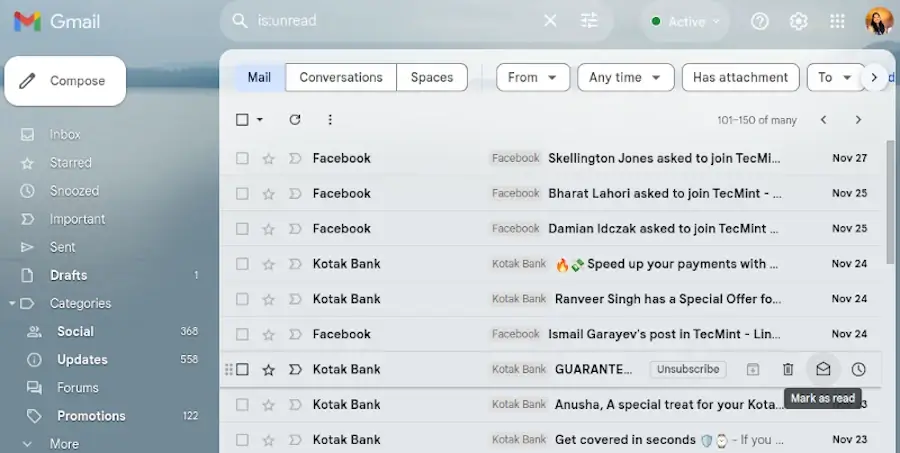
Now, click enter or return and head over to the box in the top left corner of your Gmail account, Click it to mark all the read or unread emails and finish by clicking the delete button.
How to Delete Emails in the Gmail App (Android)
- Locate and tap the Gmail app icon on your Android device to open the application.
- If you are not signed in already, enter your email address and password to access your Gmail account.
- Tap the three horizontal line icon located in the upper left corner of the app.
- Navigate down the screen and select the option Settings.
- On the next screen, select General Settings.
- Scroll down to Mail swipe actions and tap it.
- Depending on which way you want to swipe to remove all emails, tap Change to left or right swipe.
- From the options that pop out, select the delete option.
- Open your inbox once more, then swipe to remove emails in the direction you choose.
How to Delete Emails in the Gmail App (iPhone)
With the Gmail app on your iPhone, you’re able to swiftly select and delete multiple emails by using this method:
- In the upper-left corner of the Gmail application, tap the settings icon (hamburger button).
- After swiping down, select Settings.
- Select Inbox customizations
- Select Mail swiping actions.
- To delete emails, swipe in either the right or left direction by tapping the corresponding button.
- From the list that shows up, tap Trash.
- Return to your email inbox, and swipe in the direction you selected to remove the emails.
Frequently Asked Questions (FAQ’s)
Take some time to unwind and read the responses to these commonly asked questions regarding mass email deletion if you are feeling overwhelmed by the task of organizing your emails and fear that something important will be lost.
1. How to permanently delete all emails from Gmail
When you delete an email in Gmail, it is routed to a separate bin folder. Emails in the bin folder are permanently deleted after 30 days, although you can delete them sooner if you like. Here’s how you can approach it.
- Select the Bin option from the Gmail account’s left-hand sidebar after logging in.
- To permanently remove emails from the bin folder, click Empty Bin now.
2. How to recover all deleted emails
Emails that you permanently deleted from the bin folder cannot be recovered. Here, we’ll only showcase how to retrieve all emails that you have not permanently deleted.
- Click the box icon in the upper left corner of your Gmail account to select every email you want to retrieve from the bin folder.
- Next, click Select All Conversions in the bin.
- Now, click the Move to icon.
3. How to delete emails fast on the web.
You can swiftly delete all emails in your Gmail account by utilizing the keyboard shortcuts. Once you get used to using them, these keyboard shortcuts can significantly speed up the Gmail email deletion process. To get started, follow the below procedure:
- Select Settings (gear in the top-left corner).
- Next, select View All Settings.
- Go to the General tab (the default).
- Verify that the option for keyboard shortcuts is enabled by scrolling down and turning it on.
Now to delete emails in bulk: Press the keys * and a on your keyboard at the same time to select every email on the page. Next, hit # to delete the selected emails.
Conclusion
It’s that simple – you can now delete all emails in your Gmail account with optimal efficiency, regardless of the device you use. We hope you find this email life hack helpful.